Easy Clove Growing: From Seeds to Fragrant Spice
Do you love the captivating aroma of cloves in cakes or mulled wine? What if you could grow them at home? Although this spice from Indonesia conjures up images of tropical beaches, there are now easy ways to grow it at home, with a little patience and many rewarding results…
Where do cloves come from?
Before we get to the heart of the matter, a brief botanical digression. Cloves are actually the dried flower buds of an evergreen tree: the clove tree, which is native to the Moluccas in Indonesia. These small buds, harvested before they bloom, are then dried to become the intense and warming spice that we add to our dishes, infusions or winter desserts.
The clove tree, long reserved for tropical regions, can now be grown at home, provided it is given an environment that is somewhat reminiscent of its native climate.
Creating ideal conditions
The carnation tree is a delicate tree that loves warmth and humidity. To see it thrive, follow these few golden rules:
Temperature: It appreciates mild and stable temperatures, between 20°C and 30°C. Cold is its worst enemy, so if you live in a temperate area, it is best to grow it indoors or in a greenhouse.
Light: Choose low or indirect light at first. Young plants do not like direct sunlight. As they grow, they can benefit from more light.
Humidity: Carnation trees love a humid atmosphere. If the indoor air is dry, a water spray or a tray of water near the pot will work wonders.
Soil: Choose a deep, light soil, rich in organic matter and slightly acidic (pH between 5.5 and 6.5). A mixture of potting soil, coconut fiber and fine sand will be ideal.
Finding the right seeds (and avoiding the classic mistake)
Note: Dried cloves purchased commercially will not germinate. To grow cloves, you need fresh seeds, extracted directly from the fruit of the clove tree.
You have two options:
Buy your seeds from a supplier specializing in tropical plants.
Or pick the fresh fruit from an existing clove tree (if you are lucky enough to have one!) and use them immediately: their germination capacity lasts only a few days.
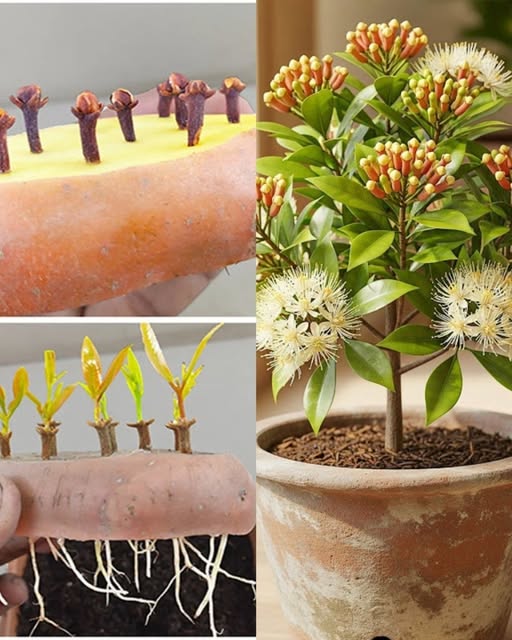
Germination stages
Prepare the seeds: Carefully remove the pulp, then soak them in room temperature water for 24 hours.
Choose the right substrate: a mixture of light potting soil, perlite and coconut fiber will ensure good drainage.
Then be careful: place each seed about 1 cm deep and keep everything moist (but not soaked).
Be patient: place the pot in a warm place, around 25 °C. Germination usually takes between 4 and 6 weeks.
Transplant and pamper your young clove tree
When several true leaves appear, it is time to move it to a larger pot or, if the climate allows, directly into the ground.
Watering: Regular, but moderate. Stagnant water can weaken the roots.
Fertilizer: a monthly application of compost or balanced liquid fertilizer will do a lot of good.
Protection: In winter, bring it indoors or in a greenhouse to protect it from the cold.
Harvest your first cloves
Patience is key: the clove tree does not start producing its first flower buds until after 5 to 8 years. Harvest them just before they open, then let them dry in the sun for a few days until they turn dark brown and harden. Store them in an airtight jar, away from moisture.
The simple joy of “homemade”
Growing cloves at home is more than just gardening: it’s a sensory experience. You get a pure, fragrant, natural spice, and above all, one you’ve grown yourself – a true joy of exotic gardening that you can enjoy all year round.
